Tutorial 8 — Reactions & the ViewBar (seeing what a joint carries)
Goal: read the loads a joint carries as arrows in the 3D view. You'll switch on the reaction overlay, size and colour it, read its magnitude labels, flip between Reaction and Action (Newton's third law), and drive the camera with the ViewBar (Top / Front / Side, Fit, Zoom-window, dock/undock) so you can actually get a clear look. Tutorial 6 gave you the joint's reaction as a number; this gives you the whole vector as a picture.
Time: ~15 minutes · Prerequisites: Tutorial 2 (the pendulum) and Tutorial 6 (its Force Request — we confirm the same physics here, visually).
Concept — holding a constraint costs force
A joint's whole job is to stop certain motion — a revolute stops everything but rotation about its axis. Stopping motion takes force: at every instant the joint applies exactly the reaction force and torque needed to keep its bodies connected and its constraint satisfied. That reaction is real, it varies through the motion, and it's what you'd size a bearing or a pin against.
Two ideas make the overlay readable:
- Reaction vs action. By Newton's third law the load comes in an equal-and-opposite pair: the reaction the joint exerts on one body, and the action that body exerts back. Same magnitude, opposite direction — you choose which one the overlay draws.
- Force vs torque. A joint can carry both a force (a push/pull, drawn as a straight arrow) and a torque (a twist, drawn as its own arrow) — give them different colours so you can tell them apart at a glance.
The overlay only draws once a run exists, and it updates every frame as you scrub — so you watch the load rise and fall in step with the motion.
Get a run with a loaded joint
1. Open the pendulum and Solve
Re-open (or rebuild) the Tutorial 2 pendulum — mass node at (0.2, 0, 1.0), Revolute to Ground with Pivot (0, 0, 2) and Hinge axis (0, 1, 0). Solve for 5 s and let it swing.
Expected: the familiar pendulum swing. The Revolute is carrying the whole weight of the bob — that's the load we're about to draw.
Turn on the reaction overlay
2. Show the arrows
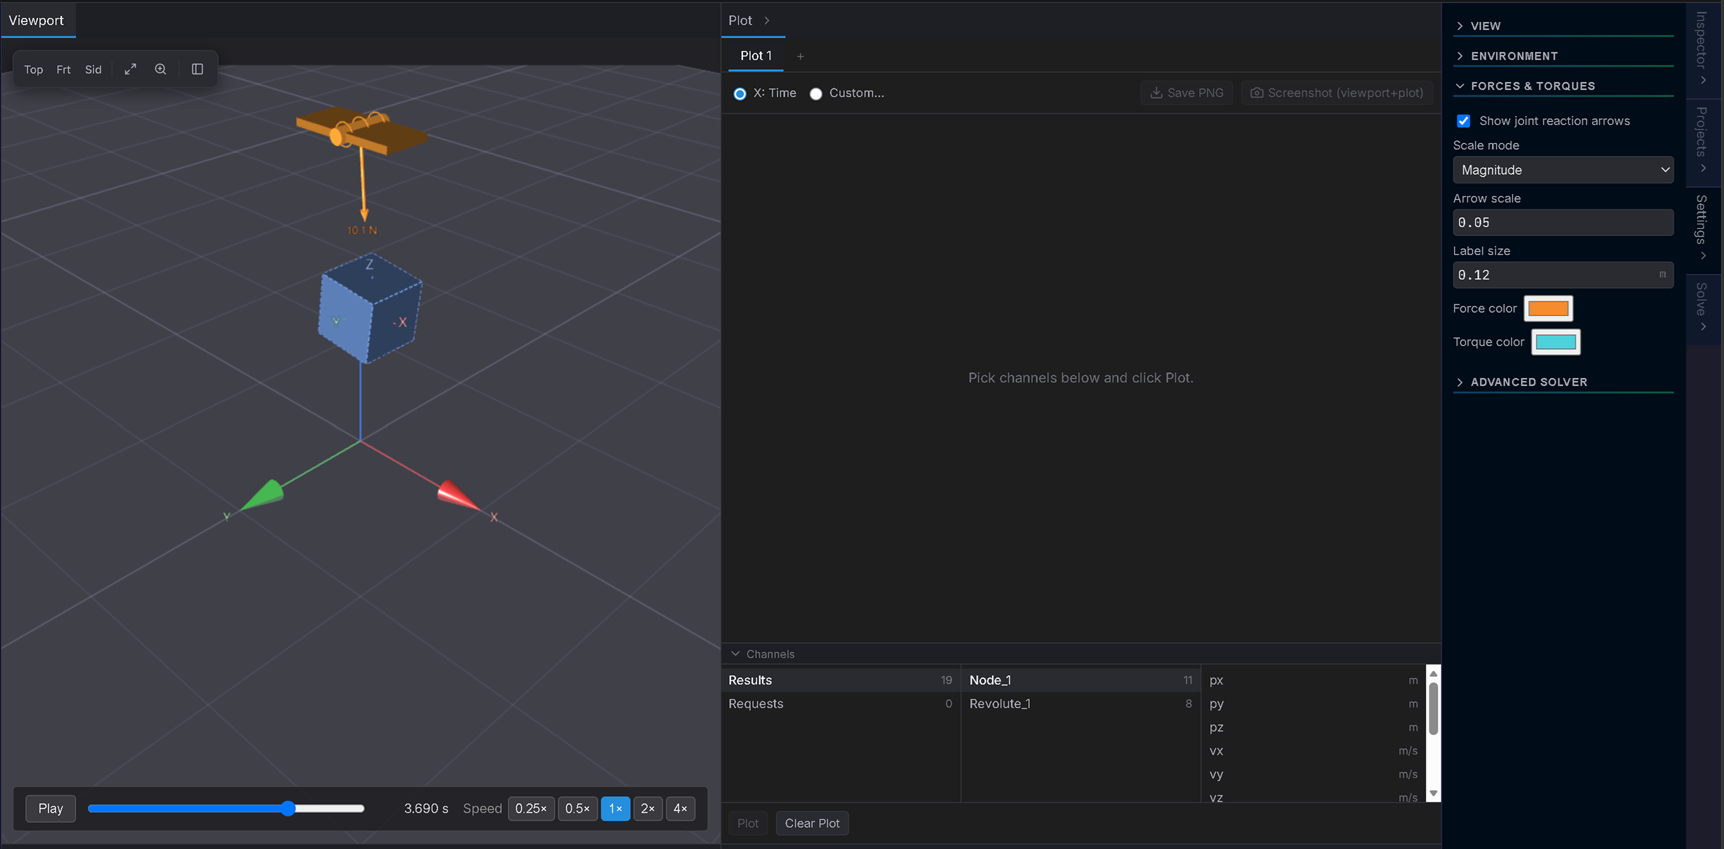
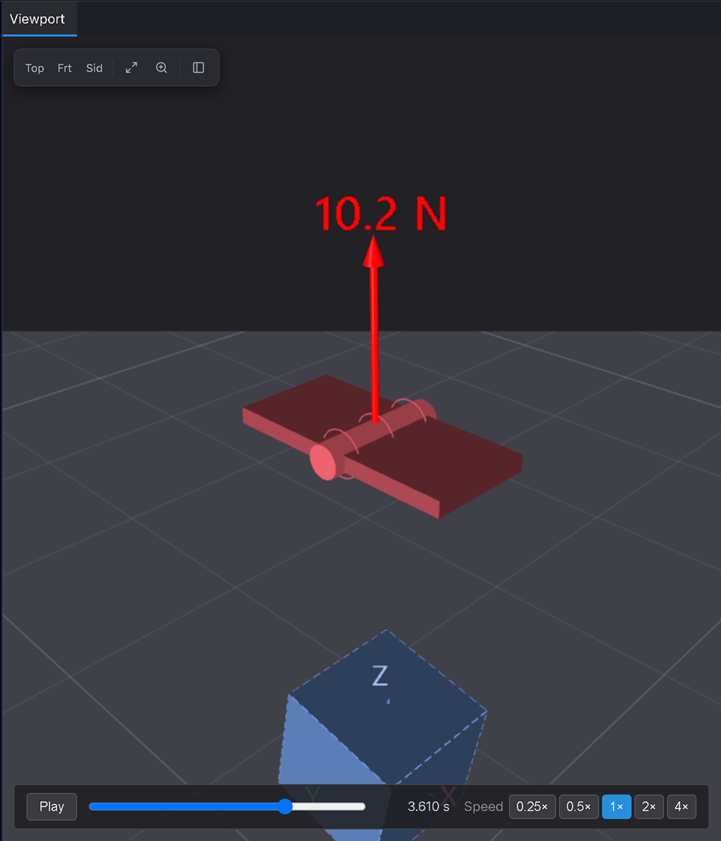
Open Settings ▸ Forces & torques and tick Show joint reaction arrows.
Expected: a reaction arrow appears at the Revolute pivot, and updates as you scrub or play — it's the force the joint applies to hold the arm.
3. Size it so you can read it
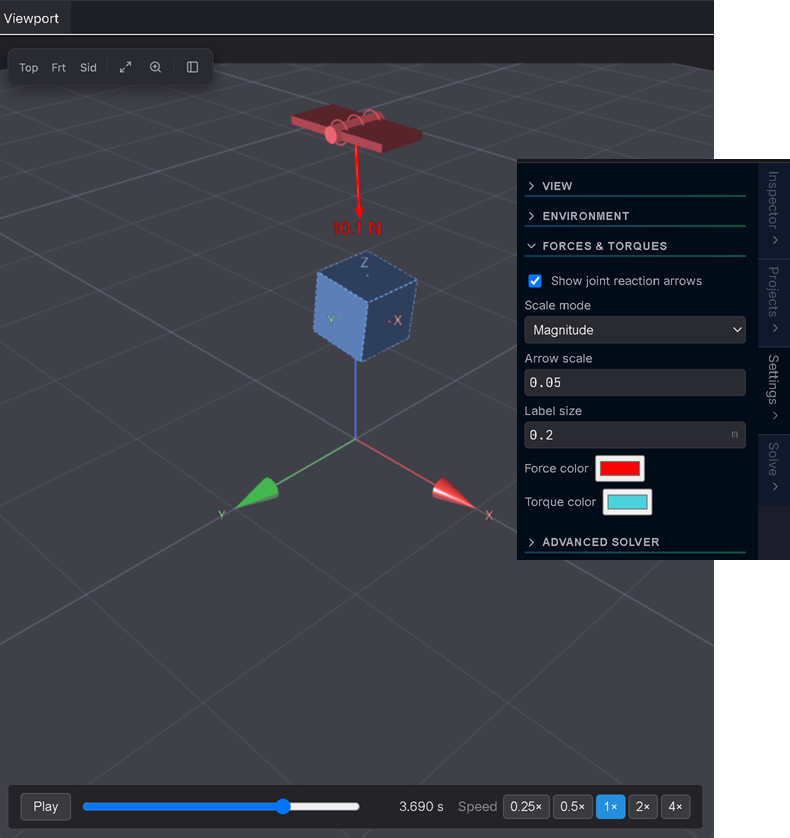
Still in Forces & torques: set Arrow scale so the arrow is a comfortable length (not a dot, not off-screen), and Label size so its magnitude label is legible. Leave Scale mode on Magnitude (arrow length scales with the force's size, so lengths are comparable frame to frame). Give Force colour and Torque colour two distinct colours.
Expected: a clearly-sized arrow with a readable magnitude label (e.g. "10.1 N") at the pivot.
Read the physics
4. Watch the reaction change through the swing
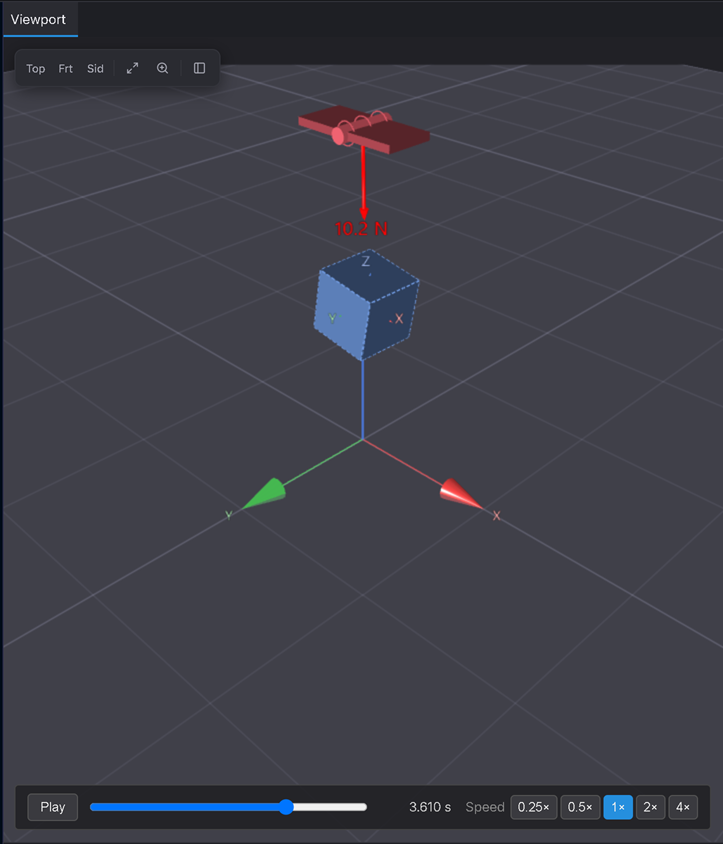
Scrub to the bottom of the swing (where the bob moves fastest), then to an extreme (where it's momentarily still).
Expected: the arrow is longest at the bottom — there the joint supports the bob's weight and supplies the centripetal pull that bends its path into an arc — and shortest at the extremes, where it only holds the weight. This is the exact fact Tutorial 6's Force Request gave you as a number; here it's a picture that changes as you scrub.
5. Flip Reaction ↔ Action
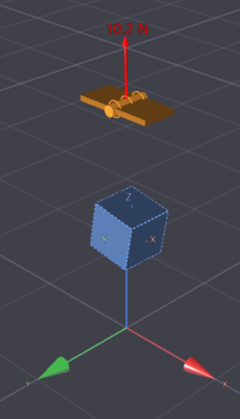
Select the Revolute (click it, or pick it in the tree). In its Inspector, find Reaction overlay shows and switch between Reaction (on A) and Action (on B).
Expected: the arrow flips to the opposite direction but keeps the same length — the equal-and-opposite pair of Newton's third law. Reaction (on A) is what the joint does to the first body; Action (on B) is what that body does back to the joint.
Drive the camera with the ViewBar
6. Line up and zoom in
The ViewBar (floating over the viewport, or docked in the toolbar — toggle with its dock button) is your camera toolkit:
- Sid (Side view) looks along the hinge axis, so the swing plane sits face-on and the reaction arrow lies in the plane of the page.
- Fit frames the whole model.
- Zoom-window: click it to arm it (it highlights), then drag a rectangle around the pivot to zoom right in on the joint and its arrow.
- Top / Frt give the other two orthographic views.
Expected: Side view flattens the swing plane; Zoom-window fills the viewport with the pivot and its reaction arrow; Fit brings the whole pendulum back.
Verifiable outcome
- The reaction arrow is longest at the bottom of the swing, shortest at the extremes — the same result as Tutorial 6's Force Request, now as a moving picture. ✅
- Reaction (on A) and Action (on B) are equal and opposite — the toggle flips the arrow's direction but not its length. ✅
- The ViewBar lines the camera up (Side view along the hinge axis) and Zoom-window frames the joint. ✅
Troubleshooting
- No arrows appear → confirm Show joint reaction arrows is on (Settings ▸ Forces & torques) and that you've Solved — the overlay needs a result to draw.
- The arrow is a tiny dot, or a huge line off-screen → adjust Arrow scale; if it jumps around frame to frame, switch Scale mode to the fixed mapping.
- I can't tell the force arrow from the torque arrow → give Force colour and Torque colour two clearly different colours.
- I can't find the ViewBar → it may be docked in the toolbar; use its dock/undock button — undocked, it floats over the viewport and you can drag it anywhere.
- Zoom-window does nothing when I drag → click it once to arm it first (it highlights blue), then drag the rectangle (or hold Shift and drag).