Tutorial 1 — Your First Simulation (drop a body)
Goal: build the simplest possible model — a single rigid body falling under gravity — solve it, and confirm it falls exactly as free-fall physics predicts. Along the way you'll meet every part of the BriskFyr workspace.
Time: ~10 minutes · Prerequisites: BriskFyr open in your browser, signed in to your free account. Nothing to install — the solver runs in the cloud. No prior MBD experience assumed.
Concept — what you're actually modelling
A rigid body floating in space has 6 degrees of freedom (DOF): it can move along X, Y, Z and rotate about each of those three axes. Nothing is holding our body — so all 6 are free. The only thing acting on it is gravity, a constant downward acceleration.
With a single downward force and no constraints, this is textbook free fall. The distance fallen after time t is:
s = ½ g t²
With g = 9.81 m/s² and t = 1 s, the body should fall ½ × 9.81 × 1² = 4.905 m. That exact number is how we'll check the simulation at the end.
Two simulation settings control how the solver computes this:
- Duration — how much simulated time to compute (we'll use 1 s).
- Time step — how finely time is sliced for the integrator (0.01 s → 100 steps). Smaller = more accurate but slower.
The workspace (orient yourself first)
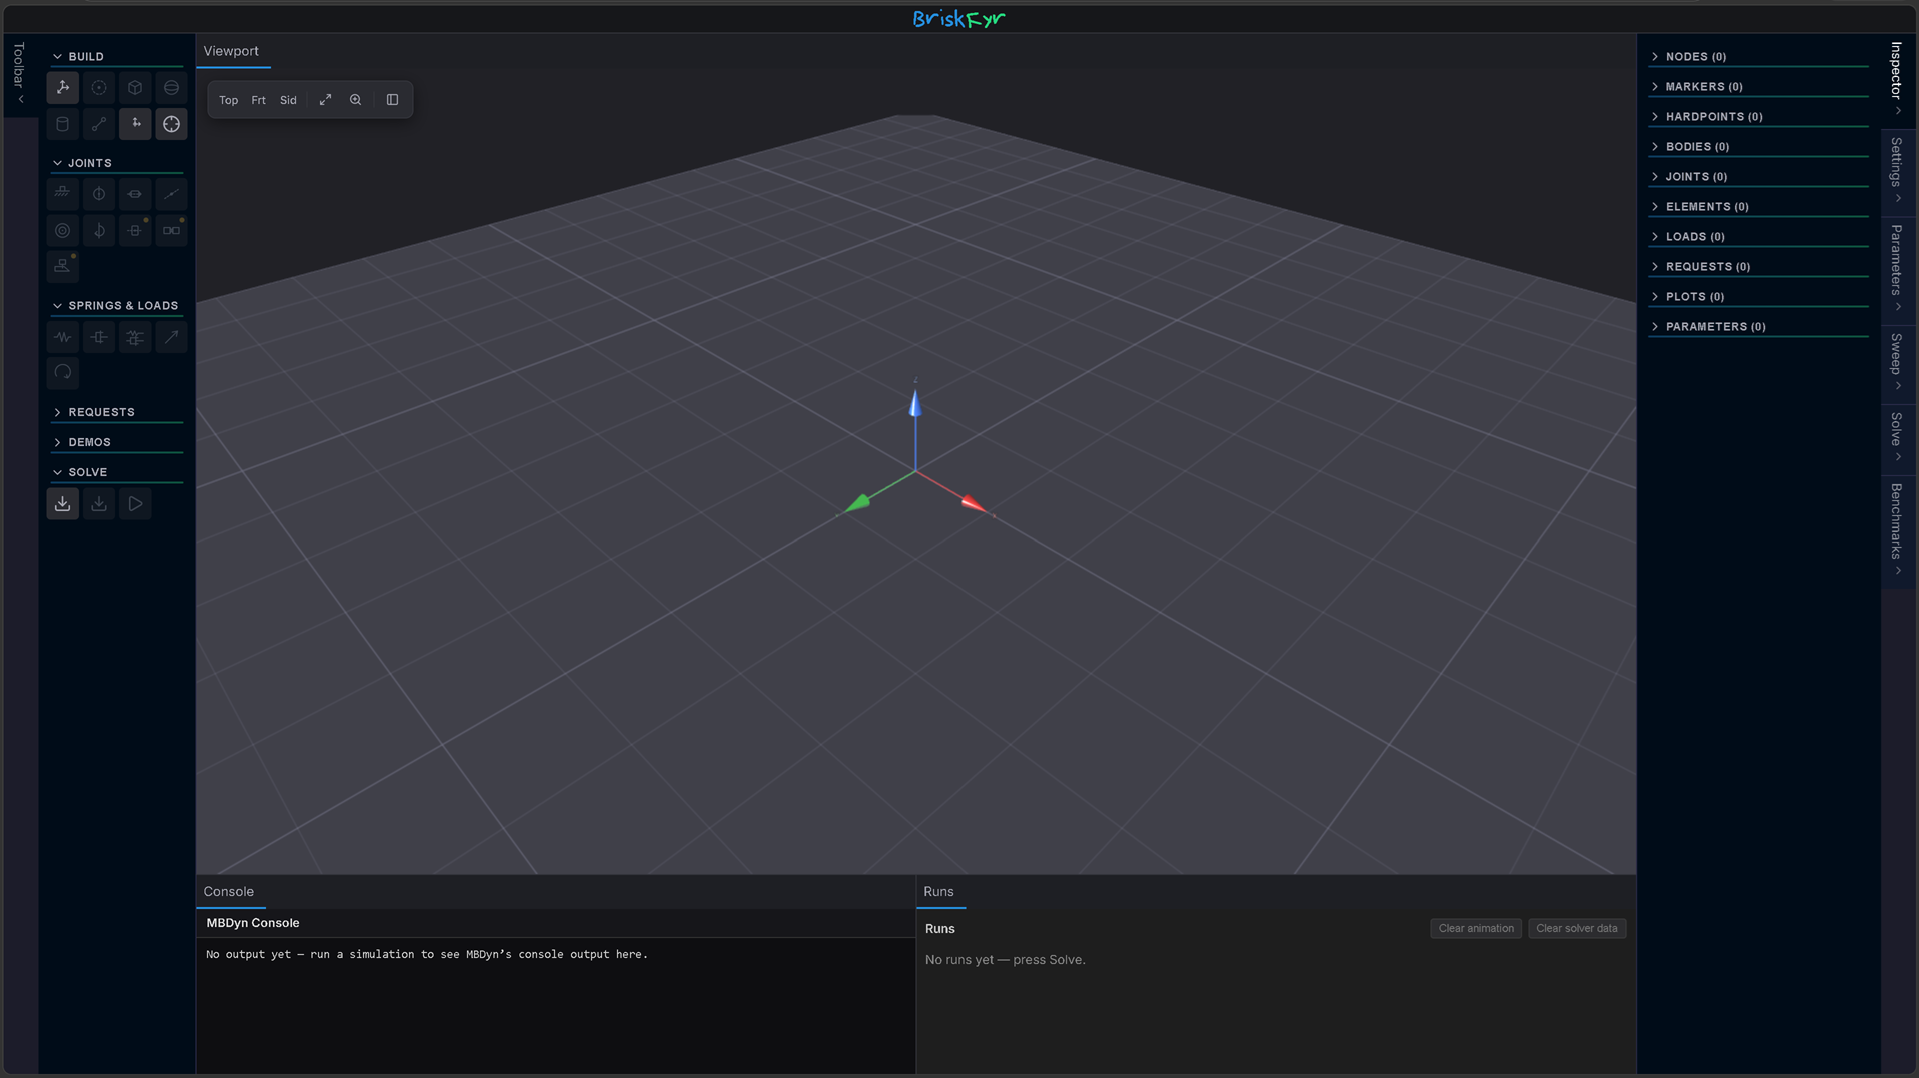
- Toolbar (left): grouped buttons — Build, Joints, Springs & Loads, Requests, Demos, Solve. This is where you add things.
- Viewport (centre): the 3D scene with a reference grid. Drag to orbit, scroll to zoom.
- Inspector (right): a tree of everything in your model; click an item to edit it.
- Settings / Solve tabs: environment (gravity, view) and the run controls.
Steps
1. Add a Node
In the toolbar's Build group, click Node.
Expected: a small node glyph appears in the viewport and
Node_1is added to the Inspector tree.
Concept: a node is a point in space that carries motion. A rigid body must be pinned to a node — the node is where the body's mass lives. That's why Node is the only button enabled at the start: in BriskFyr you place a node first, then hang a body on it.
2. Raise the node so the fall is visible
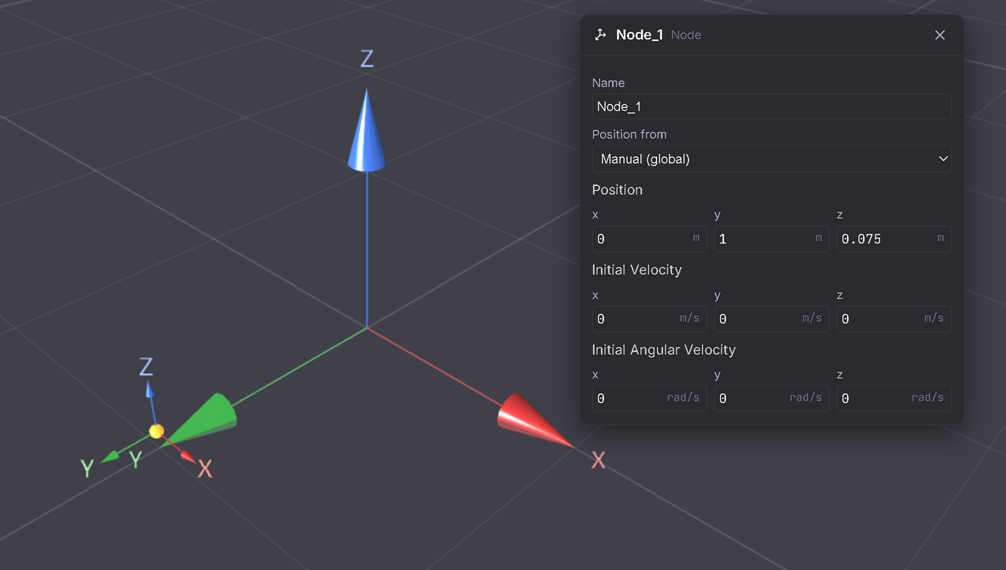
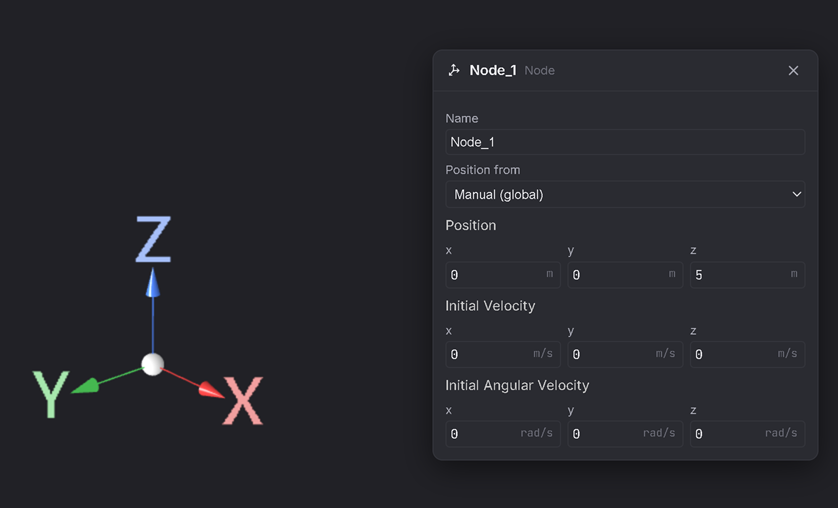
A new node starts essentially on the floor, which makes a downward fall hard to see. Select Node_1 in the Inspector and set its Position to X = 0, Y = 0, Z = 5 (5 metres up).
Expected: the node glyph jumps up to 5 m above the grid. (Up is +Z in the default view, so a bigger Z = higher.)
3. Add a Rigid Body
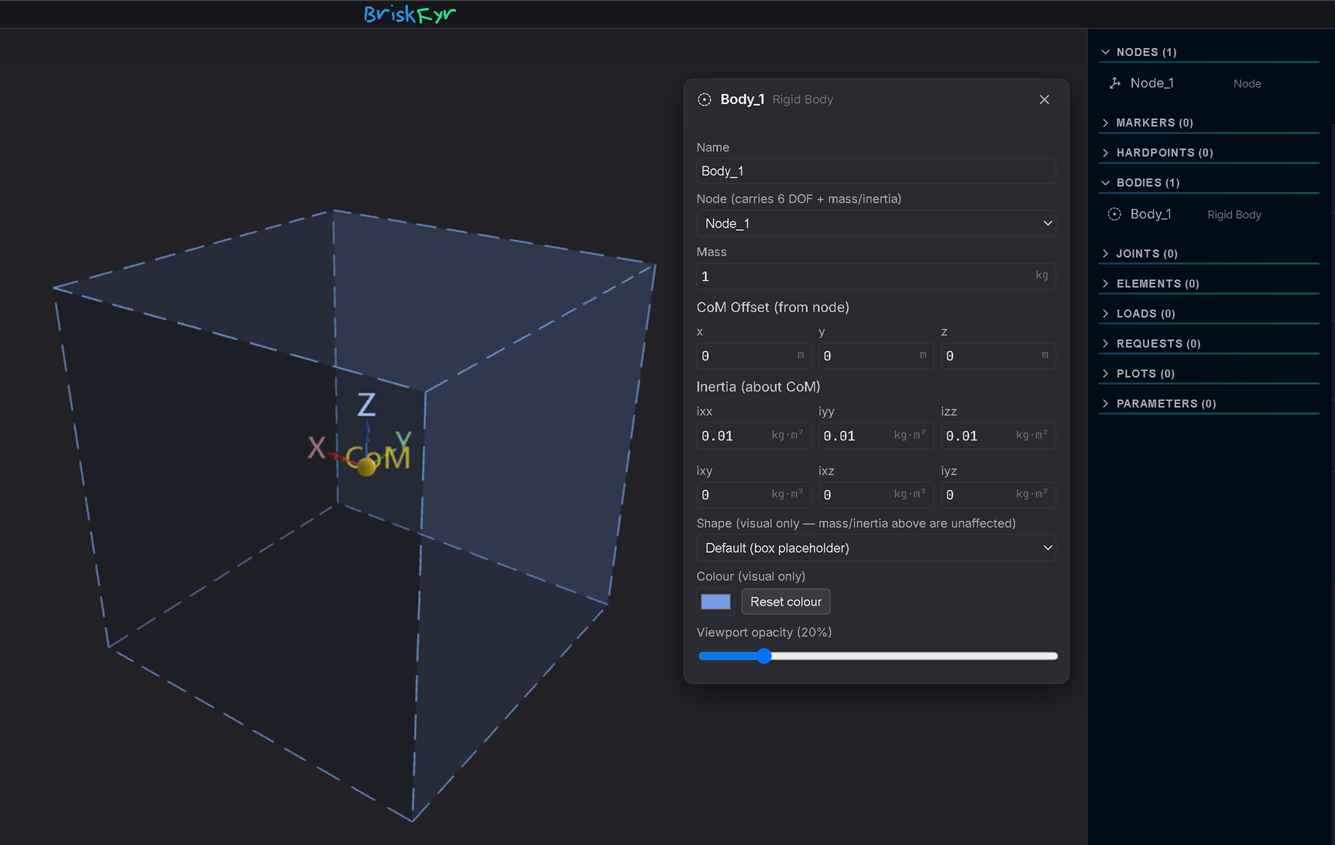
With the node in place, the Rigid Body button in the Build group is now enabled. Click it.
Expected:
Body_1appears in the tree, drawn as a box glyph sitting onNode_1(5 m up). Its default mass is 1 kg.
Concept: the body is the thing that has mass and falls. Notice the mass didn't change the answer — free-fall distance is independent of mass (Galileo's result). Tip: the Build group also has Box / Sphere / Cylinder / Link if you'd prefer a literal shape — they're visual only and behave identically.
4. Confirm gravity is on
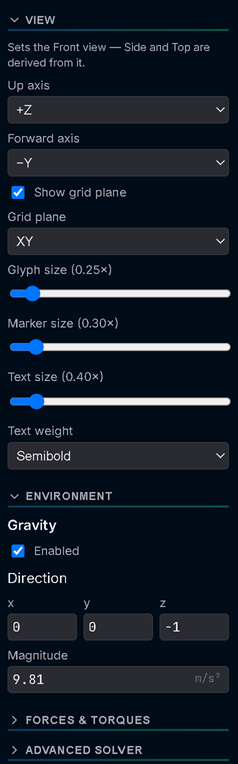
Open the Settings tab → Environment section. You'll see Gravity already configured: Enabled ✓, Direction = (0, 0, −1), Magnitude = 9.81.
Expected: gravity is on by default — you don't add it, you just confirm it. Direction (0, 0, −1) means "straight down" (since up is +Z).
Concept: gravity here is an environment property of the whole scene, not something you attach to one body — every body feels it.
5. Set the run duration
Open the Solve tab → Simulation section. Set Duration = 1 (s) and leave Time step = 0.01 (s).
Expected: Duration reads 1 s, Time step 0.01 s (= 100 solver steps).
6. Solve
Click Solve (either the Solve button in this tab, or the one in the toolbar's Solve group — they do the same thing). Your model is sent to the cloud solver, which runs it and streams the results back.
Expected: a progress indicator runs briefly, then a playback bar appears across the bottom of the viewport.
7. Play it back
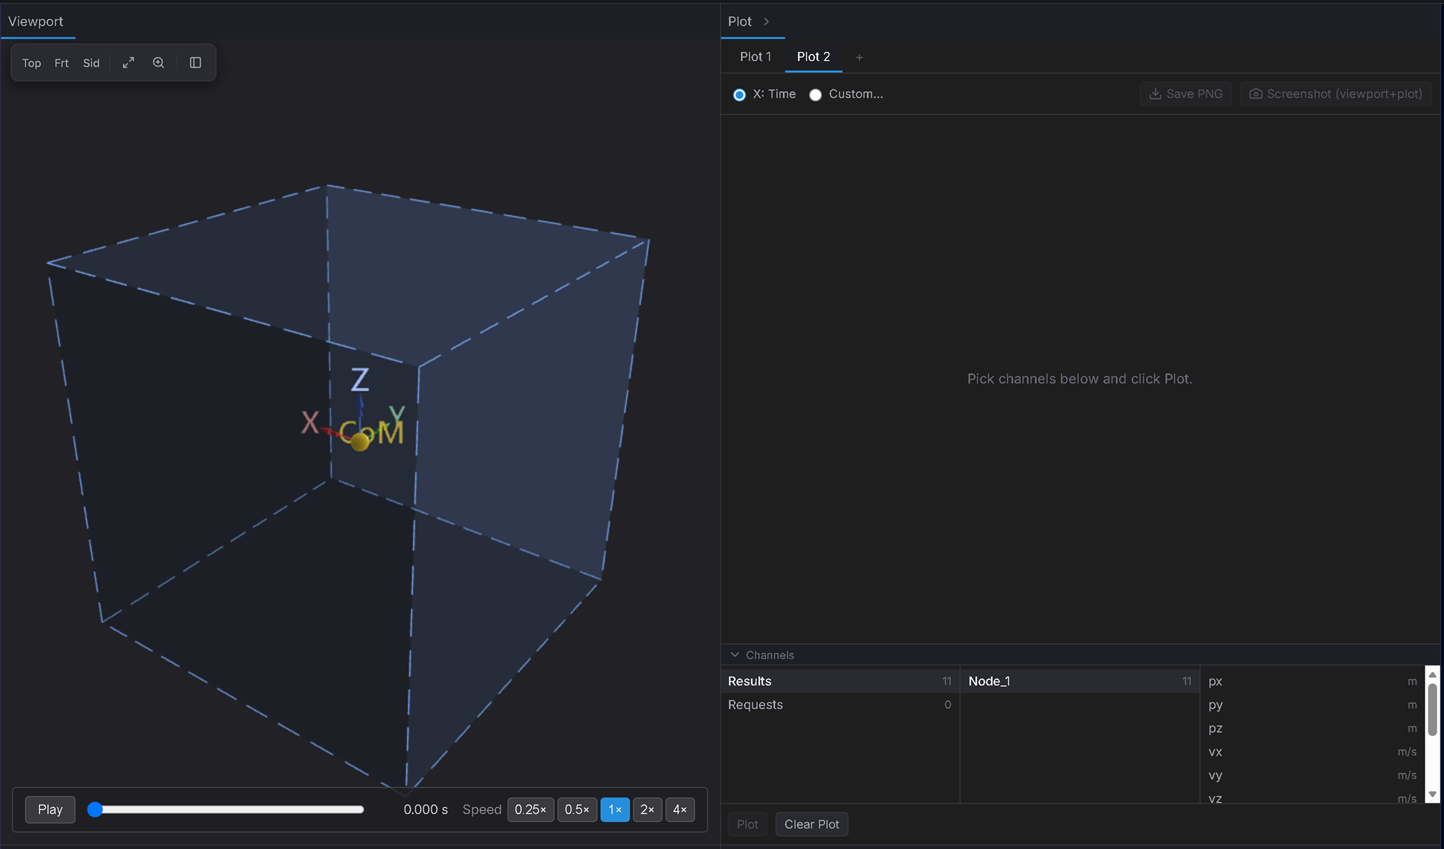
On the playback bar: press Play to watch the body fall straight down, or drag the scrub slider. The read-out on the right shows the current simulated time; the Speed presets change playback speed (not the physics). Drag the slider all the way to t = 1.000 s.
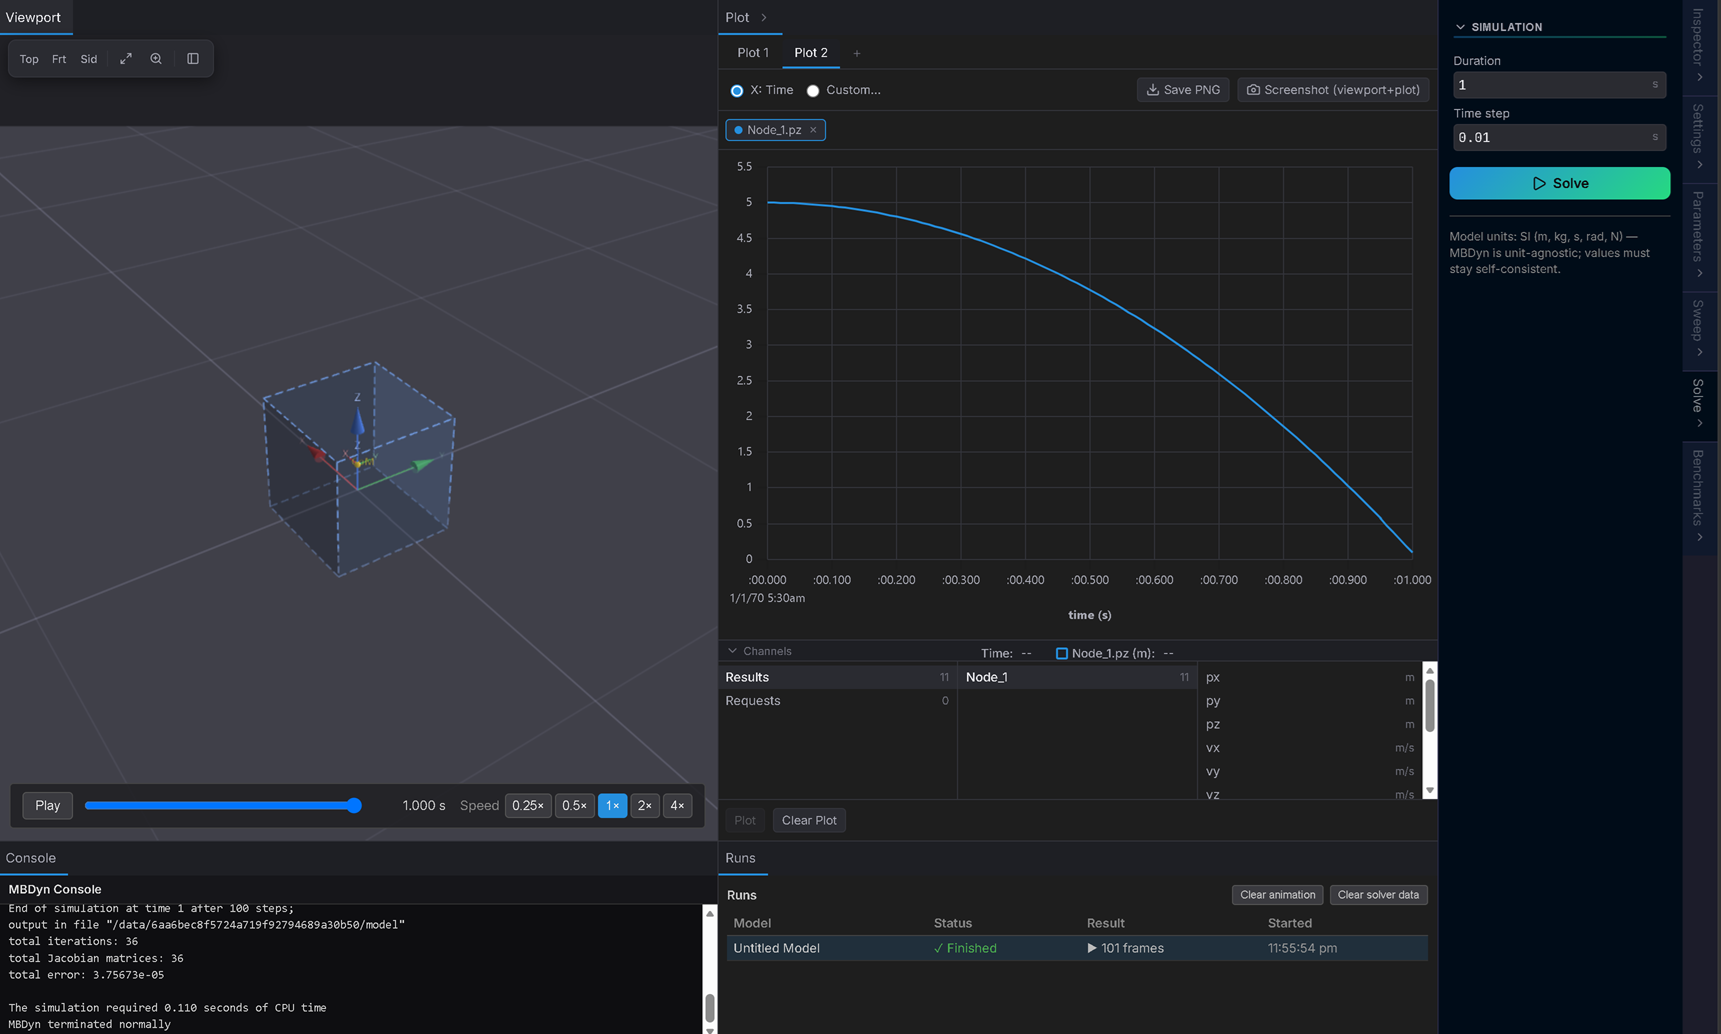
Expected: the time read-out shows 1.000 s and the body has dropped to just above the grid (≈ 0.1 m).
Verifiable outcome — does it match the physics?
The body started at Z = 5 m and at t = 1.000 s sits at ≈ 0.095 m. It fell:
5 − 0.095 ≈ 4.905 m — exactly ½ g t² = ½ × 9.81 × 1². ✅
Two ways to confirm:
- Quick (visual): at t = 1.000 s the body has clearly dropped ~5 m from where it started.
- Precise (optional — previews Tutorial 6's measuring tools): add a Marker fixed at the 5 m start point and a Distance Request between the body and that marker; scrub to t = 1.000 s and the distance reads ≈ 4.905 m. (This is the rigorous check; if it feels fiddly, that's noted — see the friction log.)
You've now built, solved, and validated your first multibody simulation.
Troubleshooting
- The body falls through the floor and out of view → you skipped Step 2 (raising the node); it starts at the grid and free-falls below it.
- Solve button is greyed out → you have no Node yet (Step 1).
- Body barely seems to move → check Duration is 1 s (not a tiny value) and gravity Magnitude is 9.81 (Step 4–5).